Pages

Monday, 13 December 2010

No Downtime for P-Dawg!

Apart from giving myself stupid nicknames (although I actually want people to call me P-Dawg from now on) I'm really quite busy right now. School's out for Xmas, but I still got 7 days of work a week. Gotta write 8000- 10000 words for dissertation, which I'm not gonna blog about, cause it's boring. I'm gonna write a plugin for Maya nParticles, that mainly enables localized erosion, but also kinda works like the Sandman effect in Spiderman 3. That's my innovations project sorted. Plus I gotta start on all the FX animation stuff for the major projects.
Okay... I started with most fun task- A fire wall for Charlie's project. I haven't really done fire before. It does look like a lot of fun though. I found David Schoneveld's blog quite a while back and I really enjoy watching his tutorials. He's pretty much "the Daddy" when it comes to MayaFluids and I learnt quite a lot. He also talked about SoUP an opensource Plugin bundle written by Peter Shipkov http://petershipkov.com/development/SOuP/SOuP.htm, which is kind of based on the node based workflow from Houdini, but for Maya. Very cool stuff for any kind of Maya related problems.
The thing Schoneveld talks about is UpresFluid in SoUP. Like I said most of the nodes are based on Houdini nodes and so is UperesFluid.
The problem with MayaFluids is that the fluid container resolution changes the simulation ( in some cases quite drastically), so when you start off with a low resolution to get the motion right in realtime and then crank the resolution up for the shading, the low resolution motion of the fluid can be significantly different to the high resolution one. In Houdini you start on a low res container then upres it, which makes an exact copy of the low res container but with the option to multiply the resolution. SoUP's upres fluid does exactly the same (Awesome!!!).
Now to the practice... Charly and Luke are going to make a life action film with quite a bit of Vfx in it. One of the effects is gonna be a wall on fire, best example to test upres fluid.
I know it's not really good, but it shows how much more details you can get out of the original MayaFluid sim. Another really handy option is the wavelet turbulence. I'm not quite sure how it works but I know by changing some of the setting it gets rid of the puffy look of the flames.
I've definitely got quite a bit more work to do.

P-Dawg is out!

Saturday, 4 December 2010

One dude post-production

I read on fxguide a couple of years back about a guy called Gareth Edwards, who directed a TV history drama about Attila the Hun for the BBC. The remarkable thing about that guy and the film was, that on top of being the director, he also made all the 250 vfx shots himself. He only used off-the-shelf software like 3DMax, After Effects and Photoshop ...AND... it only took him 5 month. Now the same guy directed a feature film called "Monsters" and guess who did all the vfx shots!
Again it only took him 5 month and again he only used off-the-shelf-software. Fxguide interviewed the guy and I want to shared it, cause it's just the perfect example of what is possible through efficiency and discipline. Especially with the major project hanging over everybodies head I hope my fellow animators take some motivation from that, regardless of their field.
Here's the link:
The link for the article about his work on Attila the Hun:


Tuesday, 30 November 2010

Eye replacemant - First Test

Since I'm doing post-production on pretty much every final project that involves CG I get to really concentrate on the stuff I really want to do this year. There are some cool projects this year, but probably the most challenging task is an real-life eye replacement on a stop motion character. It's Sarah's idea and she took it from the Canadian stop motion short "Madame Tutli-Putli" which first involved life action eye replacement. On the web side it says that production for that 17 min short took 4 years in total. The main reason is that they had the actors act out the animated scenes and then masked out the eyes and compted them on top of the stop motion character. My first thought was: "Why don't they used 3D camera mapping?" Well as it turns out the compositor working on it is mainly a portrait painter and probably (I only assume) doesn't know 3D that well. So I came up with the idea of 3D motion track the movement of the stop motion character, then camera project the life action footage (taken from the front) onto geometry, which then is animated according to the 3D motion track.
Now to the testing!
Orla did a quick stop motion test. Because of technical difficulties, we had to shoot it in low res (788 x 576), while the life action footage is shot in HD 1080.
Here's the stop motion test!


Here's the life action front shot!


So... I tracked the stop motion test, but unfortunately I (again) messed up the set up. There were not enough tracking points to track all of the movement, without any jerky glitches. The first 2, 5 seconds are pretty much useless. Well I guess that's why we do the testing. The last 6 seconds were fine though, so at least I had something to play with.
I prepared (stabilized and masked) each eye in After Effects and exported them as 32bit EXRs.

Then modeled the geometry according to the 3D location of the locators exported from the 3D motion track. Because MatchMover allows you to animate the camera rather than the scene, it's possible that the geometry can just sit in 3D space, while the camera moves around it, making it look like the geometry is moving.
This is the geometry for the projection (not perfect. Gotta spend more time on it once it comes to production).


Next thing I build the set up for the camera projection and painted transparency onto the mesh using Maya 3D paint tool! Here's a screen shot of the geometry with the life action footage projected onto it!
The main thing here is that the camera is already tilted, but because the 2d(!) footage is projected onto 3D geometry it still looks 3D.

Maya's viewport allows to see the camera projected geometry displayed and updated, which makes it easier to set up the mesh and the cameras.

The shading and lighting is going to be a bit iffy. But I tried to simulate the lighting.
That's all the work done in Maya. Now it's comping!
I rendered out each eye and one render of the mesh with a lambert material override to get some shading. The comping mainly involved color grading, masking out the nose and adding some grain to the CG shots, since the resolution was much higher (although I think I got a bit carried away with that).
I also had to paint out some bits of the puppets eyebrows, that woulg stick out at the beginning when it turns around.

There're still some things to sort out, but the main idea stands. The test was mainly to go through the pipeline and to proof to Sarah that it could be done. She's not that familiar with 3D so she didn't trust the idea at start. But I think I managed to convince her that this technique is feasible and will save her a lot of time over the masking technique from Madame Tutli-Putli.

Monday, 11 October 2010

Erosion! First Try

For my major project I decided to make some VFX shots, since that's the stuff I eventually want to do. I teamed up with Oddne again for the animation and modelling and we came up with a (pretty lame) story, of a chess game (told you! Pretty lame). Well, it has been done quite a few times, so the first question we got was: "What makes yours different?" Answer: "F*** knows!" I don't really care for narrative or story(not for my kind of work anyway). I just wanna make cool effects. So rather than trying to tell some sort of story, I'm just gonna concentrate on doing exactly that.
The main idea was that the chess pieces actually come to life and then destroy the other pieces. By 'come to life' I literally mean come to life, as in real-life actors shot on green screen. So now I have to figure out how the transformation from 3D chess piece to real life actor is going to work. Morphing has been done so many times as well, so I try to make something different here.
Erosion, seems like cool idea. The chess pieces erode into the shape of the actor.
TESTING!!! There isn't much to find, internet-wise, on that topic, so I have to come up with something on my own.
I first thought of booleans but that would've been a bit overkill. Displacement maps, I thought would be bit tedious, since I'd have to render everytime I wanted to check. But still It seemed worth a test... and HEY! That actually isn't that bad! Putting the map on a Nurbs plane and checking with MentalRay IPR, makes this a doable job. After playing around with different kinds of noise an turbulence materials and their settings, I found what I wanted.
This is the first test.
The plane next to it is for checking where the displacement map is taking the plane in y axis .

Now it's time to put it action.

Okay, that is kid of what I want. But there are obviously some issues. First: After a certain amount of erosion the object just morphs into a smaller version of itself. Second: How am I gonna integrate the real life footage into the eroded piece? I'm sure I could think of more, but I really don't want to.
Alright then... gotta figure some stuff out.
Laters!

Sunday, 10 October 2010

My first Python script!

I'm really quite proud of myself here... ok it's only 6 lines of code, but I only started learning Python yesterday. After playing around in Maya, Houdini and RealFlow I figured I should start learning Python, since all of these programs have it embedded.
After hours of reading and playing (mainly with profanity written in script form), I thought I could start with something productive. The shatter effect in Maya is really annoying me for ages now, especially the things you have to do before you can run it. Freeze transformation, delete History by type, making sure it's not assigned to a weird shader, that doesn't sound a lot, but when you're in testing mode and Maya crashes all the time, it can become a real drag. So my idea was to just take whatever object and just click a little shelf button, that would prepare the object for the shatter effect. And here it is:

import maya.cmds as cmds

if len(cmds.ls(selection=True))<1:
cmds.confirmDialog(message='Please select an object', button='OK')

cmds.makeIdentity(apply=True)
cmds.DeleteHistory()
cmds.sets(e=True, forceElement='initialShadingGroup')

The first line loads the standard Maya commands into Python.
The second line checks whether there is an object selected, and if there isn't...
the third line brings up a dialog box that says "Please select an object".
The fourth line freezes the transformation, the fifth deletes the history and the sixth assigns the intialShaderGroup to the object.
Once the script is done and tested I copied it to the shelf, next to the Create Shatter button.

I know that the entire script is written with MEL commands, and it would've been just as easy (probably even easier) to just write it MEL, but the reason I want to learn Python is that I can use it in other software packages. I believe that if I learn Python in Maya, I automatically become better in MEL, but that wouldn't be the other way around.

That is quite an entry for a 6 line script, but it's 6:10 am and I'm full of caffeine, with literally nothing else to do.
Although I could write another script... make it 7 lines this time...

Friday, 3 September 2010

Coolest Vfx Breakdown!

Gonna be blogging again soon. Just had a relaxing summer, but that is over as from... NOW!
Here's a wicked vfx breakdown for a Peugot advert. The breakdown is almost cooler than the actual ad.

Tuesday, 1 June 2010

Crew Project finished

I couldn't actually do the stuff I was supposed to do (rendering, compositing) on Andy's project so I took on Ben's project. We finished last friday at 10 o'clock in the morning. There was a lot of different comping jobs to do. And although it was really knackering at the end it was quite fun as well. A lot of the shots needed some painting jobs like rig-removal.

I also had to paint in the space between the teeth. The clay model had only a little hole.


Replacing the eyes of the duck, for a wink.


The most time consuming work was on a shot of the sea. I had to make a CG sea with a heart shaped reflection of the sun and the silhouette of the mermaid with the reflection in the middle of the sea.


This little clip had to be reflected in the glasses of Helvis.

Adding glittering stars on disco ball.


A few shots required keying out the blue screen elements and comping them into the shot.


All in all I really enjoyed working on this project. It was quite hectic, especially towards the end, but I got to use some tools in Toxik that I haven't tried before.

Monday, 24 May 2010

Last Lighting!

Andy's animation is unfortunately not gonna be finished in time so I won't be able to comp anything. I wants to render some of his stuff though, so I had to finish the lighting. This is the first time I could light the scene with the actual textures and that changed quite a lot of the original settings.


The reason why they look all a bit different is that my home monitor is set differently to the ones at uni. I put the renders in Photoshop and adjusted the colours without using the same settings.

Saturday, 8 May 2010

... and done!

Watched a pretty good and indepth tutorial on http://www.thegnomonworkshop.com/store/category/167/Free-Maya-Tutorials about subsurface scattering and I think I'm done now. I also pulled a new normal map from Mudbox.

I'm quite happy with how it looks. If I had more time I'd probably work on some maps for the nCloth to define the shape better, and I think the texture could be a bit more realistic. But I don't have more time and this isn't that bad.

Next thing is HDRI lighting and the animation for the lake.

Friday, 7 May 2010

Heart almost done!

Done the texturing, normal mapping and the animation. Only gotta figure the subsurface scattering out and my heart is finished. Then I only gotta do the environment.

I think that looks alright. I might just pull another normal map with a bit more detail, cause it does look a bit to smooth and shiny in parts. I hope the subsurface scattering adds a bit more vitality to it.
The quality of the video is not that good so here is a rendered image.

Wednesday, 5 May 2010

How awesome is that?!!!!

Found this short film done by only two French animators in their sparetime. Don't really care for the story, but it looks absolutely amazing.


MEET MELINE : THE 3D ANIMATED SHORT FILM (by Sebastien Laban & Virginie Goyons) from Sebastien LABAN on Vimeo.

Friday, 30 April 2010

Negotiation Project

This term is packed with projects, an essays and small weekly tasks. I still gotta work on the 3rd year "Corked" project, but my main project right now is what we call the "Negotiation Project", where we can basically do what we want. I pitched an idea I've seen somewhere on the internet a while ago. It was a number of shots with a CG pounding heart in different locations. I decided to replicate one of those shots. The heart is going to be pounding over a little lake in the middle of a forest. Since I'm not really good in modelling I'm going to keep it quite simple, no anatomical correctness, not in the model anyway. The pounding on the other hand should be realistic, so I did some research on how the heart actually works. This clip is probably one of the best I could find.


This one is probably the best CG animation of a human heart.


With all the information I needed I started thinking about how to do it. I came up with the idea of creating the movement of the individual chambers whit nCloth. I tested the idea with some simple objects.

That is just an nCloth sphere animated through the pressure option, to inflate and deflate.

The same but two spheres simulating one side of the heart.

With that working quite well, I put all 4 chambers together, animated them and put a simple version of a heart on top of them. All 5 objects are nCloth, with idea that the chambers drive the nCloth of the heart shape. Since there's no gravity on the nucleus solver, every time the pressure gets up the nCloth just simply flies off, but a few vertices constraints solve that problem.


That was the last test and now I started the actual modelling of the heart.
I started with a simple model in Maya and then sculpted more details in Mudbox. Once it looked roughly how I wanted it, I took the model back to Maya and modelled very low res chambers, since they have to be in roughly the same shape of the outer heart.

The animation needs a bit more tweaking to make it look more realistic.

One more test with the heart shape on top.

Another problem was that I haven't actually done any UV mapping so far. But I want to bring in some maps, like a normal map, from Mudbox. So I needed to unwrap the heart, which I thought is gonna be quite easy, but it turns out UV unwrapping an unsymmetrical object, such as my heart, is not that easy. I ended up with lots of camera projected faces, then sewed them all together with a seam hidden in the back. There probably is an easier way of doing it and still get a nice result, but I haven't really done any UV unwrapping before and it looked alright in the end.


All I've got to do now is tweaking the animation of the chambers a bit more, paint in some attributes, like thickness, onto the outer heart shape and make the maps in Mudbox.

That is roughly how I want it to look like at the end. That's just a Mudbox screenshot, so the material is gonna be different, but the veins and the detail is looking good already.

Thursday, 15 April 2010

nCloth fine tuning

Andy asked me to test the sleeves when the arms are bend, as I kind of forgot to test that first time around. Turns out that this does cause some trouble with the nCloth.

I kept the substep and max iteration really low so it would simulate faster, but that causes trouble when vertices interpenetrate. So I just adjusted some of settings, mainly the quality settings for the nCloth and the nucleus solver, which does come with the cost of simulation and caching time, but the result is hopefully worth it.

Friday, 9 April 2010

Finished Clothing

My first try wasn't really that good cause the leather jacket was a bit too stiff. So Andy and George suggested that I do it again.
On Buckle's Jacket I lowered the Input Mesh Attract values and painted Input Attract as Vertex Properties in parts where the jacket should stay in place.

The shoulder part and the collar of the jacket should be stiffer than the bottom part hence the higher values (white=1; black=0)

Here's the finished nCloth on the animated model.


For Dodger's sleeves I needed to do exactly the opposite, since his sleeves are more silk like. I actually used the nCloth preset for silk to start with. Because both sleeves are separate meshes I had to constrain them to the mesh of the body otherwise the sleeves would have just fallen of the arms to that I used 'point to surface' constrains. I also painted in some wrinkle values to get the wrinkles in the right parts.

Wrinkle values painted onto the mesh to create wrinkles near the wrist. It's basically the same procedure as with the Input Attract values.

And the finished nCloth on the animated character.

Wednesday, 7 April 2010

nCloth

I had to make some clothes for Andy's characters. Buckle here needed a thick leather jacket.


I gotta do some sleeves for another character, but the file is somehow corrupt. I hope I get that done before the weekend though.

Wednesday, 31 March 2010

Goo!

Next step for the "Corked" Project is making a gooey chilly liquid. So far I only had to play around with it, so I didn't go crazy on the settings. Just tried to make it quite viscose and sticky, as it has to stick to the bars of the cell eventually.
Here's a little test render!
I used Maya nParticles with the nucleus solver. I really like this solver it's really easy to use and it's the first time that Maya comes close the results you get in RealFlow. As I said before I didn't put high values for the settings, so the mesh is quite rough and you can clearly see the particle shapes. Those problems will be solved when I get to do the real one, but there's one problem I haven'tthought about before and I only realised now. The bump map attached to the mesh stays in 3D space so while the particles fly through the air, the map stands still. You can't probably see that because of the bad quality of the render, but it is noticeable. I have no idea how to fix that right now, but I'll find a way!

Saturday, 27 March 2010

Car rig

I did this over summer last year. I actually build a simple car rig in Maya with the main focus on terrain reaction. It took me 2 weeks, a lot of tutorials, readings and red bulls, but I got it at the end. The problem was that the simulation took so long that I couldn't proper test it. I found the already build suspension rig in Real Flow a week later and used that one instead. The whole procedure only took me 2 hours. I still learnt quite a bit about rigging and scripting though. Unfortunately I can't show any of this stuff cause I accidentally wrote over the scene with the Real Flow scene.


sorry about the crappy quality. I'm working on it.

Rope Texture

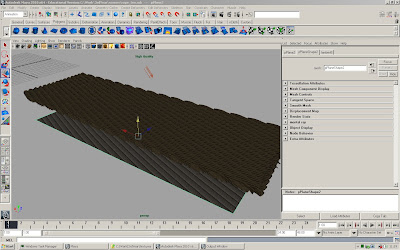
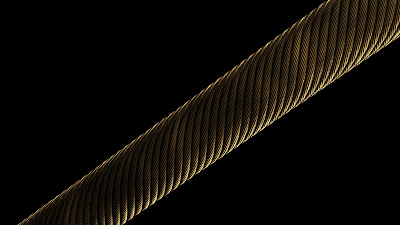
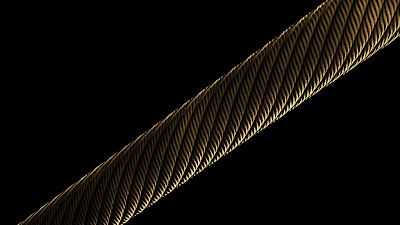
Besides the lighting I also had to create a texture for the ropes in the scene. Andy suggested the rope texture tutorial on http://www.cgtextures.com/. In this tutorial you basically build the texture by lining up a bunch of low poly cylinders in a circle then twist them, combine them into one mesh and duplicate them a few times. I created a low poly plane and put it underneath the rope mesh, then baked a normal map, a shaded map and an ambient occlusion map from the rope mesh onto the plane. To get a good result you have to increase the sample size and the resolution which also increases the time it takes Maya to transfer those maps immensely. It took 2 hours to create those three maps (2048 square resolution, highest sampling rate and 500 sampling size for the ambient occlusion)

A screenshot of the rope mesh with the normal map already transferred onto the poly plane
The shaded map.
The ambient occlusion map
And the normal map

After Maya finished the transfer mapping I could import those textures into Photoshop to create the final texture. The main thing is making the texture seamlessly tillable. I also multiplied the ambient occlusion map with the shaded map. It's important that all the changes on the shaded map match up with the normal map otherwise they wont fit together anymore.

This is the finished rope texture. Seamlessly tillable and with a bit of colour variation to make it look less dull.
The finished normal map. Also seamlessly tillable and matched up with the rope texture.
A little test in Maya. Both textures applied to a low poly cylinder.
This is probably as close as you can get without losing any information.
(click on images to enlarge)
I didn't know that this procedure takes so long, but I think the result was worth all the waiting.

Friday, 26 March 2010

Little tip for fog lights in MentalRay

The procedure of creating fog lights in Mental Ray:
  1. create your light (point or spot light, even though it works with volume lights as well, but I never tried it, not a big fan of volume lights!)
  2. create the fog light (under Light Effects)
  3. scale the cone (spot light) or the radius (point light) of the light to the desired length of the light rays. -Don't worry about intensity and colour for now-
  4. create a Mental Ray light shader. Go down in the attribute editor of the light to mental ray, open the attributes in the folder, go further down to custom shader and click on the checker board next to Light Shader, choose either mib_light_spot (spot lights) or mib_light_point (point light) to create a Mental Ray light shader.
  5. in the attribute editor go the sphereShape node (point light) or the coneShape node (spot light) and check the box Volume Sample Override in the Render Stats section. Give Volume Samples a higher number, but beware that it increases render time so leave it low for playing with the settings and crank it up for the final render. 50 is good for the start.
  6. now play around with the settings in Mental Ray Light Shader and the Fog Light. Don't worry about any settings on the original light (like intensity and colour) cause the Mental Ray Light Shader completly overrides all those attributes!

Another little tip to speed up the process of linking lights to objects:

  1. select the light
  2. change the menu set to rendering
  3. go Lighting/Shading> Select objects illuminated by light. That selects all the objects in the scene, as the light so far lights all the objects. It deselects the light though.
  4. shift select the light again
  5. go Lighting/Shading> Break light links. Now the light doesn't light any objects
  6. select the light again and shift select the objects you want it to illuminate.
  7. go Lighting/Shading> Make light links. And that's it. The light will now only illuminate those objects
If you make those commands into custom shelve buttons you can create complex object based lighting sets within minutes without going through the tedious process of light linking in the Light Linking Relationship Editor.


And more lighting!

Andy's ship is coming along nicely and I now have the ship modelled to play around with the lights a bit more. It's as always a struggle as Mental Ray has it's own little ways of doing things. Because the scene has a lot of candle lights and foggy moon lights I thought I could use fog lights which work quite nice in Maya Software Render but to get it right in Mental Ray you have to do a lot more stuff. Another thing is that I wanted to include some glowing lights to the scene. While it's really quite simple to click a little button in Maya that says Light Glow and then create the Optical FX with glows, halos and lens flares, it doesn't work in Mental Ray. So after hours of searching the internet for answers and not getting any, I figured I could try to make an object glow and use that. So I created a little NURBS sphere and assigned a blinn to it with sharp specular attributes and turned the special effect glow on. And it works in Mental Ray!
Here are some more test renders (click on the images to see larger version).

You can see the different light elements of lanterns. A point light that illuminates the scene, another point light, with a mental ray shader and fog light assigned to it to get the light rays and the glowing NURBS sphere!
Here is where the glow is working.
There's clearly too much glow on some of the pictures, but that is mainly because all the metals in the scene have the same material assigned, so they all have the same glow. Once the texturing of the props is done this problem is solved.

Again too much glow.


Sunday, 21 March 2010

Kind of finished


It's the "finished" version. Well it's what we handed in. It's only two out of 5 shots and it's not really how we wanted it to look. The roto mask on the first shot "eats" into Oddnes face-I have no idea why it looked fine on earlier renders. The main problem on the second shot is that we forgot to change our footage from 50 to 25 frames/sec. That's why the gun moves in realtime speed and me and Oddne move in slow motion. The bridge also isn't really colour corrected and looks therefore out of place. We didn't have enough time to render the other scenes and fix the problems,but I will finish this project during the easter break.

Tuesday, 16 March 2010

Lighting


Our project is to help the 3rd years with their final project. I got assigned to Andy's "Corked" project. http://andyfossey.blogspot.com/ he updates his blog pretty frequently (unlike me).
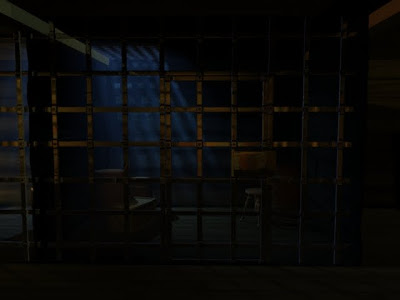
My first job is to light the scene. I got a rough set with rough textures. Andy's idea is to keep the set pretty dark with only candles and moonlight illuminating the set.
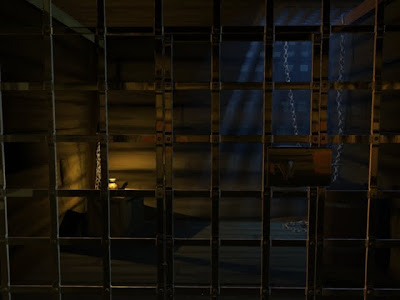
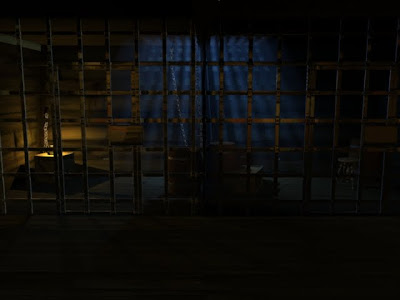
Those are the first renders of the the cage where a lot of the action is happening. I still gotta do the rest of the set, but Andy seemed pretty happy with what I've done so far so I'm just gonna keep on doing what I'm doing.

PS: click on the images to get a larger version. They're not really hi res but it gets a bit bigger.

Thursday, 11 March 2010

First Shadow Test

Well there's obviously more work to be done. But I thought I check the shadows I created. This is all done by extracting the mattes and setting them up in Toxiks Reaction node so they look like shadows.

Sunday, 7 March 2010

Masters of Visual Effects for free!

With two projects in the pipeline and the hand in date for my VFX project this friday. I really don't have time to put some elaborate entry on my blog. But I have to make people aware of this little gem. Everyone who's just remotely interested in visual effects should check it out. And don't worry it's not illegal cause the videos are not available anymore and the guy who uploaded it (Matt Silverman) was actually involved in the production (he might've even been the producer- not sure). I'm still not sure how long this is going to be on there, so watch it as soon as possible. Although vimeo clips can usually be downloaded, he didn't allow to download those clips either, which sucks a bit.

Thursday, 25 February 2010

Lighting Screenshots

I fought with lighting and perspective for the first shot again.

I created a different render layer with a material override to see the shadows better.

This is the a render of the master layer. Obviously no shadows on the ground because it's a projected matte painting and the surface shader won't receive any any lighting or shadows.

Tuesday, 23 February 2010

Problems, problems, problems (Part4)

3 weeks to go till hand in day. We mainly did tests in the first couple of weeks which was a good move in retrospective considering the amount of problems we had (hence the title of this entry). It should go smoother from now on.
One the most difficult shots we had planned involved 3d tracking. Since Maya 2010 comes with MatchMover we decided to use it for 3D motion tracking of a green box which will later be replaced with a CG gun. Oddne built a huge box out of wood and painted it green with car paint. To see his progress check out his blog http://oddne.blogspot.com/.
The box is quite heavy and like I said quite big. To handle it is difficult and that is a good thing since it will be replaced with a huge bulky metal gun. When it comes to shooting the scene we don't have to worry about acting like the gun is heavy.
We put massive crosses with black duck tape on all surfaces of the box for tracking markers and shot some test footage.


First of all you can see that we didn't use a tripod and a hand-held camera shot is really not good for this procedure. It's not impossible but you would have to track the environment as well which is especially in this case unnecessary work. I realised pretty soon after putting the footage into MatchMover that the crosses are far to big. MatchMover only needs contrast between pixels. The bigger the markers the more likely it is that the track jumps within the the massive amount of black, it just won't see a pattern any more but a big black surface. Then I realised that the tape is quite reflective so whenever it turns to where the light hits it it becomes white. That obviously isn't good for the tracking software which searches for colour differences between pixels so the tracking makers really shouldn't change colours. The main problem though is that I haven't used a 3D tracker before neither have my team mates nor any of my class mates for that matter. Although Georg has used 3D tracking software before he never used MatchMover. So I went home and did all the tutorials I could find and read the manual. Unfortunately there isn't much about 3d motion tracking in the manual or online. 3D tracking software is mainly used to imitate a camera track. The manual had a section about tracking moving objects so I followed that route. It says I would have to make a mask over the moving objects (in this case me and the box) then auto track the environment, invert the mask to only track the moving object(in this case only the box) and track this information into a different group. After a couple of tries I managed to solve the 3D camera, but the points where far from accurate. Frustrated and tired I returned to uni on the next day only to find out that Georg found an easy way to track objects by importing a mesh into the scene and attach its vertices to a tracking point. I tried it and it didn't work but only because I couldn't track enough points to solve a camera. All in all I would say that this test footage is absolutely useless. But I guess that's what test footage is for. I did pretty much every mistakes you could do when preparing a shot for 3D tracking, but at least I know better now.
So when the day of the shooting came I measured the box, built the exact replica in Maya with a few more divisions on each face evenly spread and measured the distance between each vertices to tape tiny squares of insulation tape(smaller and less reflective than duck tape!)to the right place onto the box.


That is the shot we're going to use. I'm going to talk about the experience of the green screen shoot in another entry. The footage looked alright but I still wasn't looking forward tracking it. I haven't exactly had a successful solve yet and the amount of hours that go with it making the whole tracking experience a rather unpleasant matter.
I locked myself in my room (not literally) for the night with a few energy drinks and a big pouch of tobacco. 5 hours later, all the energy drinks gone and my tiny room stinking of fags, I had 45 hand tracked points. While waiting for the solve to finish I tried to think of ways to still make the shot if it doesn't work (which I was expecting). Once it finished I changed to the 3D view to check the mess I just made and I saw this...
IT WORKS!
Ok there is a little glitch when he picks it up, but that can be easily be fixed in Maya.
It was 3am by then and I had to get up at 7 to go to but it was so worth it.
I had to wait until after the weekend to show Oddne, Simon and Georg my progress. We obviously then had to try how it looks with the CG gun on top of it so I exported the the MatchMover scene into Maya and parented the gun to the locators and after a bit of tweaking I got that!

Here is the MatchMover scene in Maya. The 3D tracking points have been exported as locators.

And this is a rough version of the gun parented to those locators.

I think it looks quite good already. I will have to tweak the position of the gun a bit and get rid of those twitches by baking the keyframes and then manually correct them, but I think we're onto something good here.
Unfortunately there is a part 5 of my "Problems, problems, problems" blog series. This time it's the empty bullet shelves flying out of the gun using particles and instancers.

Monday, 22 February 2010

Problems, problems, problems (Part3)

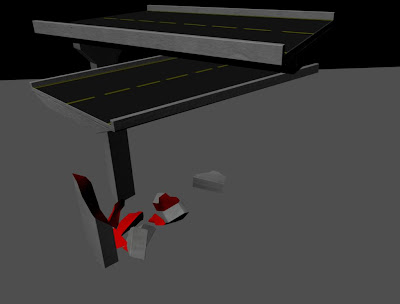
I already explained in an earlier entry that we're going to use a 3D element as a mid ground element for the matte painting since it looks kind of empty. Oddne was busy building a bridge which will eventually be duplicated so we have it on both sides. In the far distance one of the bridges will overlap the other, but to make it a bit more interesting I decided to collapse them on top of each other. Maya Shatter Effect seemed perfect for that, but I had no idea that this little inbuilt gimmick has so many flaws.
It seems pretty simple. I thought I would just take the parts of the bridge (built with polygons as required) I wanted to be shattered and apply the Solid Shatter option with a bit of jagged edges and a separate interior material.
First thing I noticed you can't really go high in numbers for the shards count, Maya or rather my PC and the PC's at uni really struggle. But that shouldn't be much of a problem just shatter it with a low number shard counts first then shatter the bigger pieces again. Well... that doesn't work!
For some reason the Shatter Effect does not work on already shattered pieces. I figured out that this is because of a little conflict between the shaders. It only works if you don't have any shaders on the geometry applied in the first place (so Maya uses the Initial Shader Group) and you turned of apply interior material in Shatter Effect option box. That is not really useful at all because it's really hard to texture the pieces afterwards. Georg then showed me some shatter scripts written by some clever people and put on the internet to use for free for stupid people like me. I tried a few scripts from http://www.creativecrash.com/. Even though most of them don't have an issue with reshattering (don't know if that word actually exists) but they either don't have an jagged edge option so it just cuts the geometry in perfect straight lines or they don't have the option of applying an interior material. I ended up using a script called Ax Crack (http://www.axelgaertner.de/axcrack/) written by a German compositor (I don't know how I always end up talking about Germans or Germany on my blog). That script had it all. Only downside is that it is a bit confusing and it seems like the guy himself doesn't quite know how the script really works. I think it even says on the very minimalistic instruction page that you should try out all the options and see which one looks best, that isn't really an ideal notion considering that Maya crashes every time you try to undo a the shattering because of a known problem with Maya's boolean operation. It is a very nice script though and I'm glad that he shared it with the world!
After I shattered all the pieces, I converted them into rigid bodies and applied some forces to them. I did it rather step by step then collapse them all in one go ensure that Maya doesn't crash.

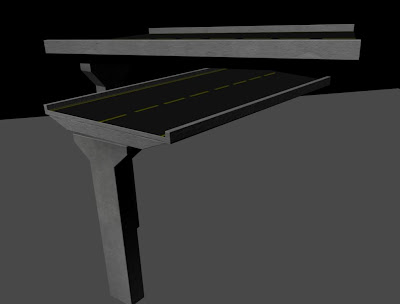
The original geometry before the shatter script applied.

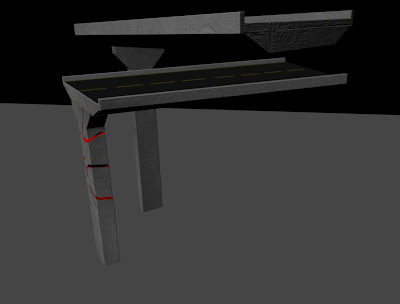
First pillar shattered with an offset to avoid interpenetration between the shattered pieces.

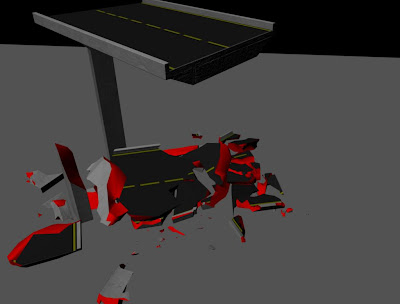
Pillar pieces shattered on the floor. I left one big piece standing ( as a passive rigid body) so it looks like it's naturally collapsed. After the simulation is over and all the pieces are settled on the floor I set their position as an initial state an turned them into passive rigid bodies with collision on.
The top bit collapsed. Because the shattered pieces of the pillar aren't active any more they won't move, but with collision left on they still interact with the active rigid bodies of the bridge top. The red material is the interior material automatically applied by the script.

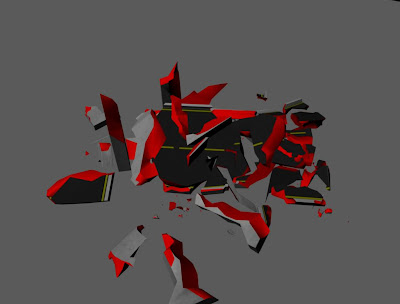
All geometry shattered. I used quite high numbers for the step size in the rigid body solver attribute menu to make the simulation go quicker. After all it's not important that the simulation looks real, since you don't see it at the end. Whenever a piece looked out of place or wouldn't settle on the ground I positioned it by hand by turning on the " allow disconnection" in the rigid solver and then breaking the connection for the individual piece.
Shattered pieces with texture and a bit of bump mapping. I didn't really worry to much about the texture it's going to be too far away to notice.

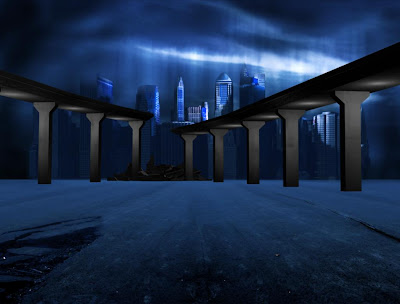
Finished and imported into the scene with provisional lighting.