I already explained in an earlier entry that we're going to use a 3D element as a mid ground element for the matte painting since it looks kind of empty. Oddne was busy building a bridge which will eventually be duplicated so we have it on both sides. In the far distance one of the bridges will overlap the other, but to make it a bit more interesting I decided to collapse them on top of each other. Maya Shatter Effect seemed perfect for that, but I had no idea that this little inbuilt gimmick has so many flaws.
It seems pretty simple. I thought I would just take the parts of the bridge (built with polygons as required) I wanted to be shattered and apply the Solid Shatter option with a bit of jagged edges and a separate interior material.
First thing I noticed you can't really go high in numbers for the shards count, Maya or rather my PC and the PC's at uni really struggle. But that shouldn't be much of a problem just shatter it with a low number shard counts first then shatter the bigger pieces again. Well... that doesn't work!
For some reason the Shatter Effect does not work on already shattered pieces. I figured out that this is because of a little conflict between the shaders. It only works if you don't have any shaders on the geometry applied in the first place (so Maya uses the Initial Shader Group) and you turned of apply interior material in Shatter Effect option box. That is not really useful at all because it's really hard to texture the pieces afterwards. Georg then showed me some shatter scripts written by some clever people and put on the internet to use for free for stupid people like me. I tried a few scripts from http://www.creativecrash.com/. Even though most of them don't have an issue with reshattering (don't know if that word actually exists) but they either don't have an jagged edge option so it just cuts the geometry in perfect straight lines or they don't have the option of applying an interior material. I ended up using a script called Ax Crack (http://www.axelgaertner.de/axcrack/) written by a German compositor (I don't know how I always end up talking about Germans or Germany on my blog). That script had it all. Only downside is that it is a bit confusing and it seems like the guy himself doesn't quite know how the script really works. I think it even says on the very minimalistic instruction page that you should try out all the options and see which one looks best, that isn't really an ideal notion considering that Maya crashes every time you try to undo a the shattering because of a known problem with Maya's boolean operation. It is a very nice script though and I'm glad that he shared it with the world!
After I shattered all the pieces, I converted them into rigid bodies and applied some forces to them. I did it rather step by step then collapse them all in one go ensure that Maya doesn't crash.
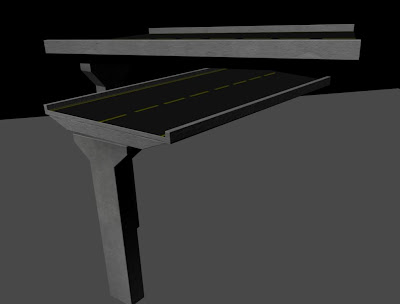
The original geometry before the shatter script applied.
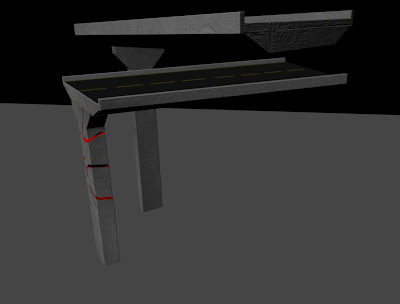
First pillar shattered with an offset to avoid interpenetration between the shattered pieces.
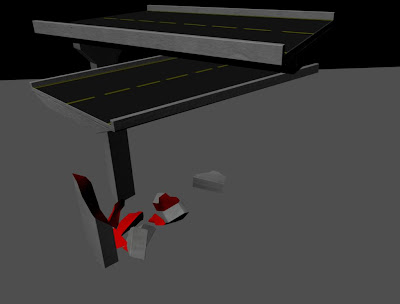
Pillar pieces shattered on the floor. I left one big piece standing ( as a passive rigid body) so it looks like it's naturally collapsed. After the simulation is over and all the pieces are settled on the floor I set their position as an initial state an turned them into passive rigid bodies with collision on.
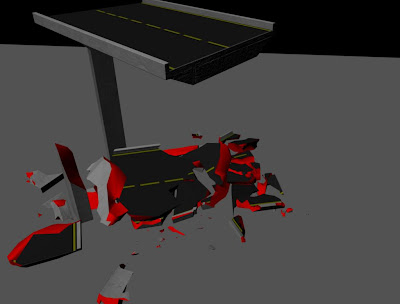
The top bit collapsed. Because the shattered pieces of the pillar aren't active any more they won't move, but with collision left on they still interact with the active rigid bodies of the bridge top. The red material is the interior material automatically applied by the script.
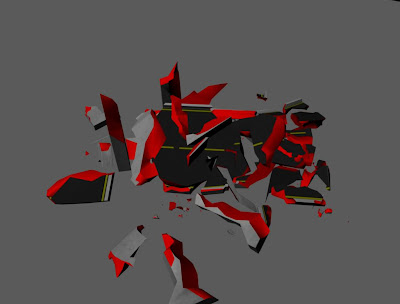
All geometry shattered. I used quite high numbers for the step size in the rigid body solver attribute menu to make the simulation go quicker. After all it's not important that the simulation looks real, since you don't see it at the end. Whenever a piece looked out of place or wouldn't settle on the ground I positioned it by hand by turning on the " allow disconnection" in the rigid solver and then breaking the connection for the individual piece.
Shattered pieces with texture and a bit of bump mapping. I didn't really worry to much about the texture it's going to be too far away to notice.
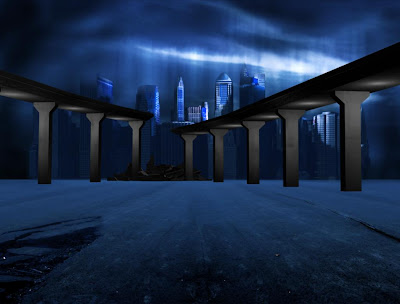
Finished and imported into the scene with provisional lighting.

No comments:
Post a Comment